Hang on now Doc, is my horse really that chunky?

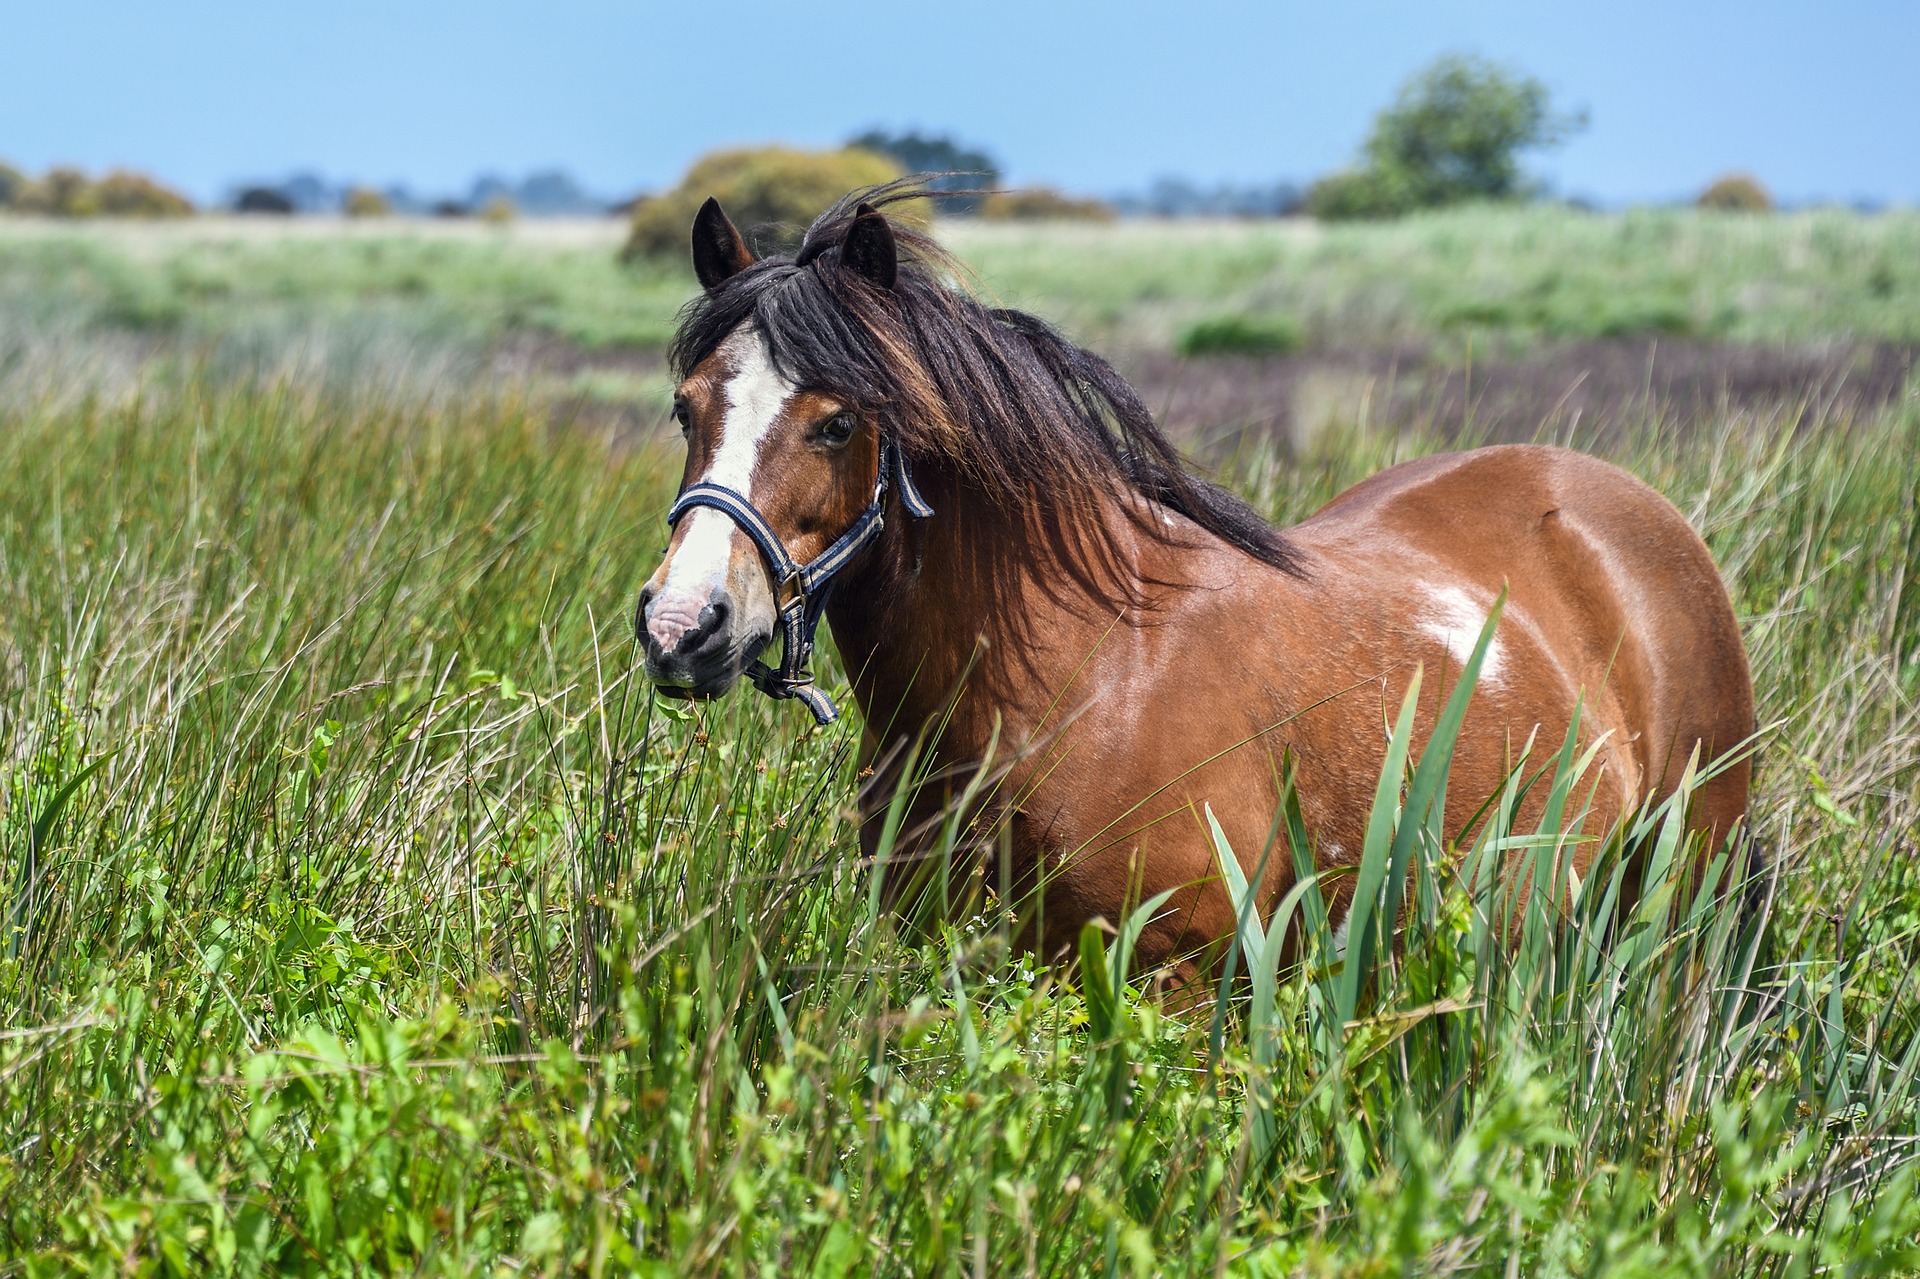
Sometimes when we as horseman see our horses on a routine basis, it can be easy to overlook that thickened, cresty neck or the fat pads that have developed on either side of their tail head.  We recognize that it has been quite a while since we’ve been able to palpate any evidence of their ribs, but what other physical indicators do we use as veterinarians to assess the body condition of our patients?  With the significant increase in metabolic laminitis cases seen on a national level, now more than ever, it is important to ensure our horses remain a healthy weight. 

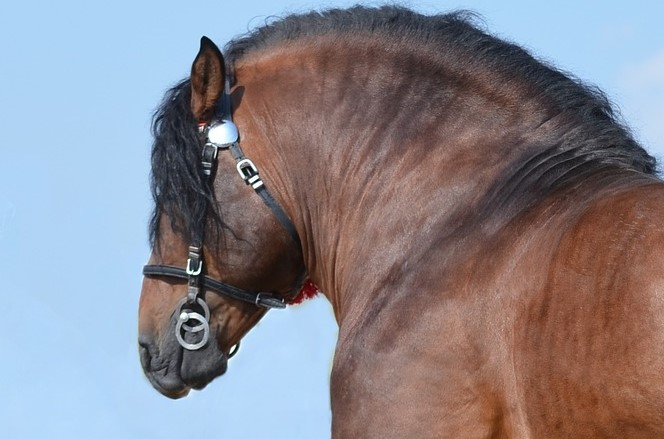
As a veterinarian, the first indication that I may be dealing with a horse in metabolic crisis is not their enlarged abdominal girth but instead is the thickened, hardened appearance to their crest.  The crest is the region directly under the horse’s mane along the topside of their neck.  A normal crest palpates soft, fluctuant, and homogenous to the surrounding tissue and muscle.  The crest on a horse in metabolic crisis becomes hardened, like the density of cauliflower.  The crest can also become wider and more visually pronounced in severe cases.  As the metabolic disease process progresses, horses can develop regional adiposity, also known as the accumulation of fat pads throughout their body.  These pads of adipose tissue most commonly develop behind the shoulder blades on either side of the withers and on either side of the tail head.  In severe cases, adipose pads can develop along either side of the thoracolumbar spine and in the girth region.    A horse of a healthy weight has no evidence of regional adiposity, with rib coverage that allows for palpation of each individual rib but not the visual distinction of each rib. 

Body condition scoring in horses is commonly done using the Henneke System.  This scoring system was developed in 1983 and has been accepted throughout the international equine industry as a standardized means to assess adiposity in horses.  The scores range from 1 to 9 with a score of 1 being associated with extreme emaciation and a score of 9 correlating to extreme obesity.  Below is an outline of the individual scores:

Poor: Grade 1 – Extreme emaciation; no presence of fatty tissue, all bony prominences including withers, shoulder blade, dorsal spinous processes, ribs, pelvis and sacrum are all clearly visible.

Very Thin: Grade 2 – Emaciated; slight tissue cover over bony prominences but withers, shoulder blade, dorsal spinous processes, ribs, pelvis and sacrum are all clearly visible.

Thin: Grade 3 – Slight accumulation of adipose tissue; bony prominences are no longer clearly discernible; some fill over withers, shoulders and throughout the neck, ribs still visible.

Moderately Thin: Grade 4 – Ridge of spine and withers are still visibly pronounced, ribs still visible, some accumulation of adipose tissue over the shoulders and through the neck and tail head region. 

Moderate: Grade 5 – Spine and ribs cannot be visibly differentiated although ribs can be palpated, tail head is soft and squishy; withers, shoulders and neck are smooth and rounded.

Moderately Fleshy: Grade 6 – slight crease down the spine, tail head is still soft and squishy, regions of adipose accumulation are present on either side of the withers and through the crest, most ribs can still be palpated but not all of them.

Fleshy: Grade 7 – a crease is present along the spine, the ribs have fat filling between them, tail head is still soft, regions of adipose accumulation are pronounced through the crest and on either side of the withers. 

Fat: Grade 8 – a definite crease is present along the spine (aka. “drainage ditch”), it is difficult to feel any ribs, soft adipose tissue surrounds the tail head, the neck/crest is quite enlarged and there is adipose accumulation on the inner aspects of the hind limbs as well as behind the shoulder blades.

Extremely Fat: Grade 9 – the “drainage ditch” collects water when it rains, there is bulging adipose accumulation on top of the ribs, behind the shoulders, through the crest and on either side of the tail head.  Accumulated abdominal fat is also present on the underside of the flank. 

To confirm your horse is in optimal health, it is important to be able to accurately grade your horse’s body condition.  An ideal range is between 4-6, depending on the breed and usage of your horse.  If your horse falls outside of this range, it is important to discuss the nutritional components of your horse’s diet with your veterinarian to decrease the risks associated with equine obesity and ensure your horse isn’t deficient in necessary nutrients. 

Horse Trailering 101

With summer finally here, I hope more and more clients will be loading up their horses and hitting the road on their next great adventure!  As you’re packing up your trailer here are a few aspects of trailering that might be worth considering to ensure safe and successful transit.

Trailer Maintenance

While your trailer doesn’t need its oil replaced and its wiper blades changed, it does require annual maintenance to insure safe and effective usage.  Every year, ball bearings should be inspected, cleaned and repacked with fresh lubricant.  The brake assemblies should be checked to ensure optimal braking and all exterior lights should be inspected and replaced if necessary to provide ample visibility.  Make sure your trailer breakaway battery is live and holding charge.  Kick those tires a few times.  Are they underinflated? Flat? Cracked or succumbing to dry rot?  Lift the floor mats and inspect the flooring underneath.  Any rotten wood or rusted metal should be replaced to ensure your horse doesn’t fall through the trailer floor.  Check the ceiling for any hornets or wasps who have decided to take up residence in your trailer over the last few months.  All old bedding should be stripped and new applied to prevent excessive dust from circulating while in transit.  Replace old hay with new and if you have a water tank, drain and clean it before adding fresh water for the season. 

Trailer First Aid

When traveling with my horse, I always make sure I have a well-stocked equine first aid kit.  (Do I have a human first aid kit too you ask?  I feel much of my horse’s first aid kit can be utilized for human trauma and there’s always a few Advil floating around the bottom of my purse.  That’ll suffice, right?!).  In an ideal world, your day to day equine first aid kit would be portable and you could just pack it along with your horse.  But, if you are leaving a few equine friends behind, follow this link to learn more about what should be in your equine first aid kit and how to determine if veterinary intervention is required in case of emergency.  https://aaep.org/issue/guidelines-equine-emergencies 

Now that we have equine first aid covered, what about your trailer?  What happens if you get a flat tire?  Do you have the tools to change it?  The two most important pieces of equipment for changing your trailer tire are a Trailer Aid wheel jack (or something comparable but trust me, this product is a lifesaver!) and a 4-way tire iron lug wrench.  There are plenty of good tutorials out there to demonstrate the tie changing process so I won’t go into that here.  Just be sure you pull off the highway as much as possible to change the tire, leave the trailer hooked to the truck and leave the horses on the trailer.  There are a multitude of other complications that can arise while on the road but this is where having reliable roadside assistance will come in handy!

Hauling Safely

Many horseman make the decision to wrap their horses legs while hauling.  There are various makes and models of equine shipping boots that are easy to apply and offer superior protection in the case of an accident.  Regardless of the length of the trip, as a horseman and veterinarian, I would always recommend wrapping your horse’s legs.  You never know when the car behind you won’t be paying attention and may end up rear ending your rig. 

In most situations, the horse’s head should be tied a length that precludes him from moving excessively in the trailer while also enabling him to eat, drink and clear his nose.  If a horse’s head is tied too short and they’re being shipped for long distances, they are deprived of the ability to clear debris from their upper airways through sneezing and coughing.  When this situation arises, equine shipping fever is a common complication of the respiratory tract.  I also recommend horses are tied in a trailer with a breakaway halter in case of trailer accident. 

As for distance, it is ideal to keep daily travel time under eight hours.  If you must exceed this time frame, be sure to offer water to your horse multiple times while on the trip.  It is common for horses to go off water while shipping so I recommend clients feed their horses a soaked diet for two to three days prior to a long trip, during the trip and two to three days after the trip to insure adequate hydration.  Soaked beet pulp, hay products and grain are great sources of feed that can be used to create a mash. Electrolytes in powder or paste form also work to stimulate thirst and facilitate the consumption of water.  Failure to consume adequate water during shipping may result in impaction colic. 

Taking your horse off property should be a fun and exciting adventure.  Preparing for common difficulties while on the road will help to establish confidence in the trailering experience and will set you and your horse up for success in the case of emergency. 

Deciphering GI supplements

Prior to picking out a GI supplement for your horse, I would highly recommend you refer to an earlier blog I wrote discussing how to go about picking a general nutritional supplement. The post contains some decent tips and tricks to better prepare you to find the best GI supplement for your horse.

Once you have a general idea of how to pick a bioavailable supplement, let’s dive into why you would want to supply a GI support supplement.

Does your horse need a GI supplement?

Some of the most common reasons I recommend a GI supplement include:
• Chronic, mild episodes of gas colic
• Chronic gastric ulcers
• Chronic diarrhea
• Sand accumulation in the hind gut
• Recovering from acute colic surgery
• Intoxication (plants, feed, GI disease, etc.)
• Long term use of Non-Steroidal Anti-inflammatory Drugs (NSAIDs)

What ingredients should the supplement include?

If we’re looking to repopulate the equine GI tract with healthy bacteria, stick with a product containing Sacchromyces boullardi organisms. These bugs seem to be able to survive the incredibly acidic environment of the equine stomach so that they can make it to the hind gut to elicit a beneficial response. In addition, certain strains of microorganisms, like Lactobacillus, can also competitively disable pathologic bacteria within the GI tract to keep them from initiating a disease process.

As for the foregut, horses suffering from chronic gastric ulcers can usually benefit from long term supplementation of a product geared towards neutralizing the acid naturally produced in the stomach. This can include any kind of a chemical base but the key to delivering an efficacious response with these products is the consistency in which the supplement is delivered. Horses empty their stomachs every 10-15 minutes so direct buffering of the stomach contents must be an ongoing process. For best effect, these supplements are provided several times a day. There are also several plant-based products, like aloe vera, that some owners have anecdotally found to be effective.

What do the studies say?

In over the counter research studies pertaining to veterinary probiotics, label claims regarding the species and number of viable organisms in the product, appear to be quite inaccurate. As such, it is often more effective to focus on providing valuable prebiotics for the microorganisms currently residing in your horse’s GI tract. Many of the prebiotics on the market contain various type of high-value fiber products for the microbes to ferment. Since the forage and fiber in these products isn’t damaged by the acidic nature of the stomach contents, this is often a better approach to caring for the hind gut microbes.

Overall, there is a vast array of supplements on the market and most of them are not worth the investment. If you have concerns about the health of your horse’s GI tract, please reach out to your veterinarian and we will be more than happy to recommend products we have found to be most beneficial in each situation.

Different Styles of Equine Chiropractic Adjustment

Any of you who have watched Dr. Hartman adjust a horse will immediately notice that her approach might not conform to one’s initial expectation.  We all have a general idea that a chiropractic adjustment involves a high velocity, low amplitude (HVLA) thrust, but that isn’t the only option available to chiropractic practitioners. What’s best for your horse may be something entirely different.

Is your horse ready for chiropractic adjustment?

Before initiating any chiropractic manipulations, Dr. Hartman begins every appointment with a focus on the musculature and mind of the horse.  It is important for the horse to be mentally present and physically relaxed during the session so that any restrictions within the musculature can be addressed.  If we keep in mind that it is the muscles that control the vertebrae of the spine, it immediately becomes evident that these too are a part of the overall chiropractic equation.  Without addressing acute and chronic issues with the musculature, the efficacy and duration of therapeutic effects resulting from the chiropractic adjustment may be less than optimal.  In severe situations, Dr. Hartman may choose to forgo chiropractic treatment for the day in favor of addressing the muscular pain and restrictions so as not to cause further damage with a HVLA thrust.

What chiropractic method is appropriate for your horse?

Once the musculature supporting the spine is in a malleable state, the timing is now appropriate for chiropractic manipulation.  In some situations, a traditional HVLA thrust is appropriate to address any restrictions in the spine.  However, over the past few years, Dr. Hartman has worked with her mentor, Dr. Kyla Awes, to incorporate a new technique of adjusting into her system.  Keeping in mind that a vertebral motion unit can move in multiple planes, Dr. Hartman can often create a fulcrum with her hand around which she can manipulate the horse’s body.  As a result, she can restore motion of the vertebral motion unit in multiple planes with one adjustment.  Think of it like the “two birds with one stone” analogy.

Additionally, some horses perceive the HVLA thrust as an aggressive act, especially those that are highly reactive or sore in their musculature.  By integrating this new approach into her practice, Dr. Hartman has been able to accommodate the needs of various types of horses from the heavy-boned draft horses to the sensitive Arabians.


Every horse is a unique individual and as such, will benefit from different styles and approaches of chiropractic care.  During an appointment, Dr. Hartman will work to identify the primary source of back pain in your horse (ie. Hind limb lameness, poor saddle fit, overriding dorsal spinous processes, nutritional deficiencies, etc).  In addition, she will also work with you to develop short and long term plans to keep your horse sound and comfortable.  Please don’t hesitate to get in touch with Dr. Hartman to discuss how chiropractic work can help your horse.

Joint Injections: The what, when and why of intraarticular medications

Photo Courtesy nikki_tate on Flickr

Arthritis is one of the most common joint diseases found in the equine industry.  It is the leading factor of decreased performance and chronic lameness in our equine partners and is the source of much frustration and consternation.  The insidious nature of the process means that we as horseman don’t always catch it in the early stages, and instead, are left dealing with the disease in more moderate to advanced situations.  In a previous blog we’ve focused on how to prolong the onset of arthritis by using systemic nutraceutical or injectable products like Cosequin and Adequan (you can find that post here).  This article will focus on the options available to us when these initial attempts against arthritis are no longer efficacious.

What happens during a joint injection?

Once our systemic therapies like Adequan and Legend have no longer proven to be effective in reducing joint pain associated with arthritis, we turn to localized treatment directly within the damaged joint.  Prior to injecting any joints, your veterinarian will perform a thorough lameness exam to isolate the joint(s) from which the lameness is originating.  From there, we as veterinarians prefer to obtain radiographs of the joint in question.  This provides us both a baseline for future assessments as well as a better opportunity to understand any changes to the diseased joint that may alter our approach to needle placement.  The information obtained from the radiograph enables us to give our clients a more accurate prognosis for both post-injection soundness and duration of efficacy of the injection.

Preventing joint infection

Once you and your veterinarian have agreed to inject a joint(s), your veterinarian will then display an odd set of behaviors in which they tirelessly seek out the ideal location to perform an injection.  The biggest risk associated with a joint injection is infection, so we tend to be pretty picky about when and how we inject.  We avoid all windy situations, including drafts, as it seems just as you place the needle into the joint, a large gust of wind comes along and stirs up dust and debris which could potentially contaminate the joint.  We also avoid injecting horses with wet mud/manure directly over and surrounding the site of injection.  Clean, dry legs are necessary. We avoid areas of high traffic, as all it takes is an unknowing rider or the sneeze of a horse to contaminate our sterile site.

The ideal environment for a joint injection is one that has clean, dry footing (rubber mats or concrete work best), that is enclosed to restrict

Image Courtesy USMC via Flickr

or prevent airflow.  Fewer birds in the overhead peanut gallery is also preferred!  If these requirements cannot be found, don’t be surprised if your vet chooses to reschedule for a calmer/dryer day or you’re asked to relocate to a more ideal location.  At the end of the day, a joint infection can be life altering so we strive to avoid those at all costs!

The injection process itself is also sterile.  We will relocate all sources of potential contamination (tails, lead ropes, etc.) and will usually clip the injection site.  All joint injections are preceded with a 12-minute sterile scrub, and all products used in the injection process are also sterile, including your vet’s gloves!  Most practitioners will also use a small amount of antibiotic within the injection itself to further reduce the risk of infection.

What exactly is injected into the joint? 

As mentioned before, there is a small amount of antibiotic that is included in every injection, but beyond that, there is significant variability.  Larger volume joints (think coffin joints, knees, stifles, fetlocks) usually receive a high molecular weight hyaluronic acid (HA) and possibly steroids.  The steroids work to decrease the pre-existing inflammation within the joint and the HA helps bring healthy components into the area to improve the overall joint environment.  (There is also a mild anti-inflammatory response associated with HA).  Lower volume joints (pastern joints and the lower hocks) usually just receive steroids and antibiotic, forgoing the HA due to the small volume of joint space available to accommodate the injection.  There are several types of steroids available to use and which steroid we use is dependent on a multitude of factors.  These include high vs low motion joints, age of horse, severity of the intraarticular disease process, and metabolic status of the horse.  Steroids are contraindicated in horses with metabolic disorders which then has us reaching for an alternative – autogenous intraarticular therapies also termed “regenerative medicine.”

Regenerative Medicine Therapies

For those horses with metabolic issues or who no longer respond well to intraarticular steroids, we now have a variety of options for use in their place.  IRAP (interleukin-1 receptor antagonist protein), PRP (platelet rich plasma) and Prostride are all newer, autogenous technologies available to the veterinary industry.  While PRP and ProStride have applications in horses with arthritis, IRAP is far and away the most commonly used.

IRAP is processed directly from your horse’s blood and it works to counteract the interleukin-1 (IL-1) inflammatory protein.  The blood is collected into a special tube that is then incubated for several hours.  During the incubation process, the IRAP molecule is amplified within the sample.  After incubation, the sample is spun in a centrifuge which then separates the red blood cells from the IRAP rich plasma.  The plasma is then divided up into small aliquots to be used during the joint injection process.  Unlike steroids, which usually only require one injection to have a beneficial response, IRAP requires 2-3 injections, separated by 2 weeks in order to deliver similar results.  The IRAP injections usually last an average of 6-8 months, but the duration of efficacy is dependent upon a multitude of factors and is different for every horse.

While arthritis can be a difficult condition to overcome, rest assured that we do have a large variety of therapeutic options to pursue.  Please don’t hesitate to reach out with additional questions or concerns the next time you see one of us at your barn.  We’re always happy to help you and your horse!


Henderson Castration Technique

As some of you know, Dr. Hartman uses a slightly different technique to castrate male horses called the Henderson castration technique.  It involves the use of a power drill and a specialized clamp to literally twist off the testicle.  Traditional methods involve the use of an emasculator which crushes the tissue to ensure adequate termination of blood flow.   If the emasculator has been around for such a long time and works, why turn to power tools??

Continue reading